TermBar Install Guide
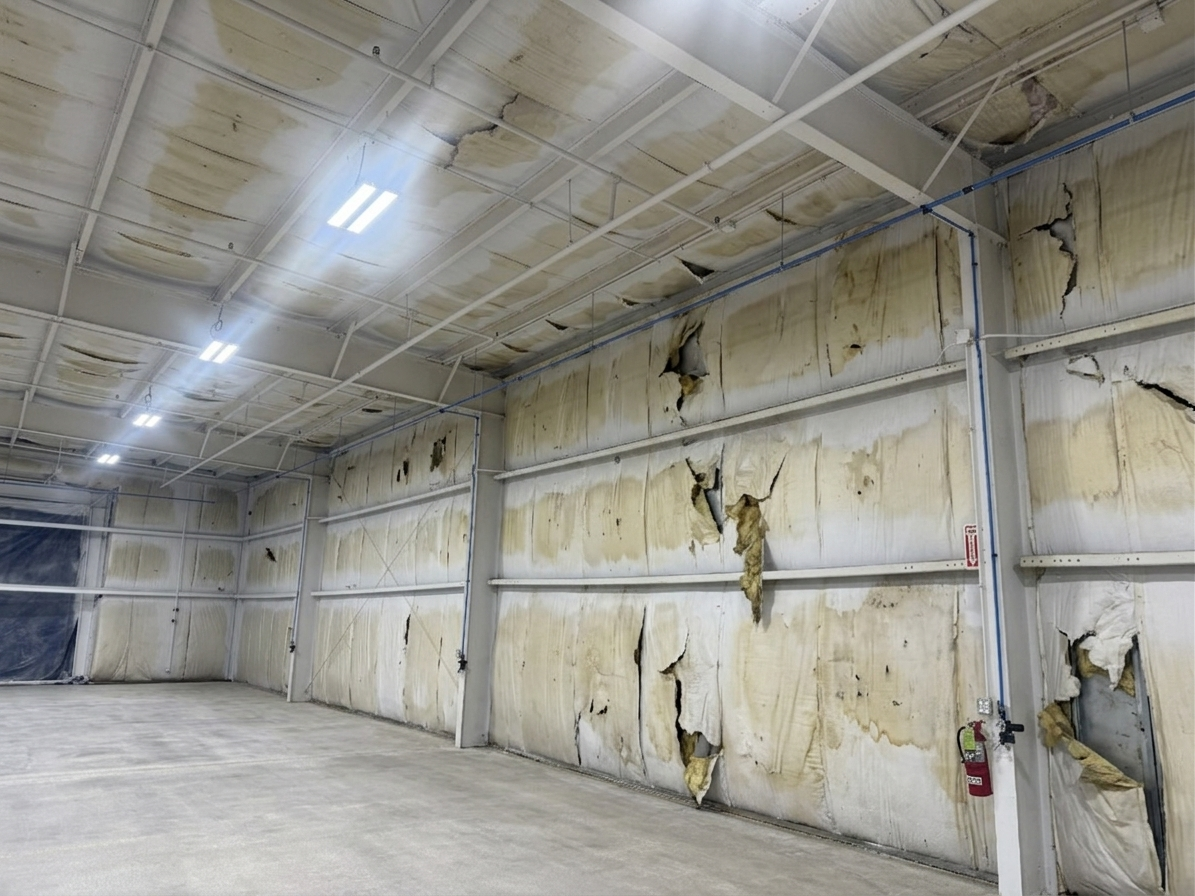
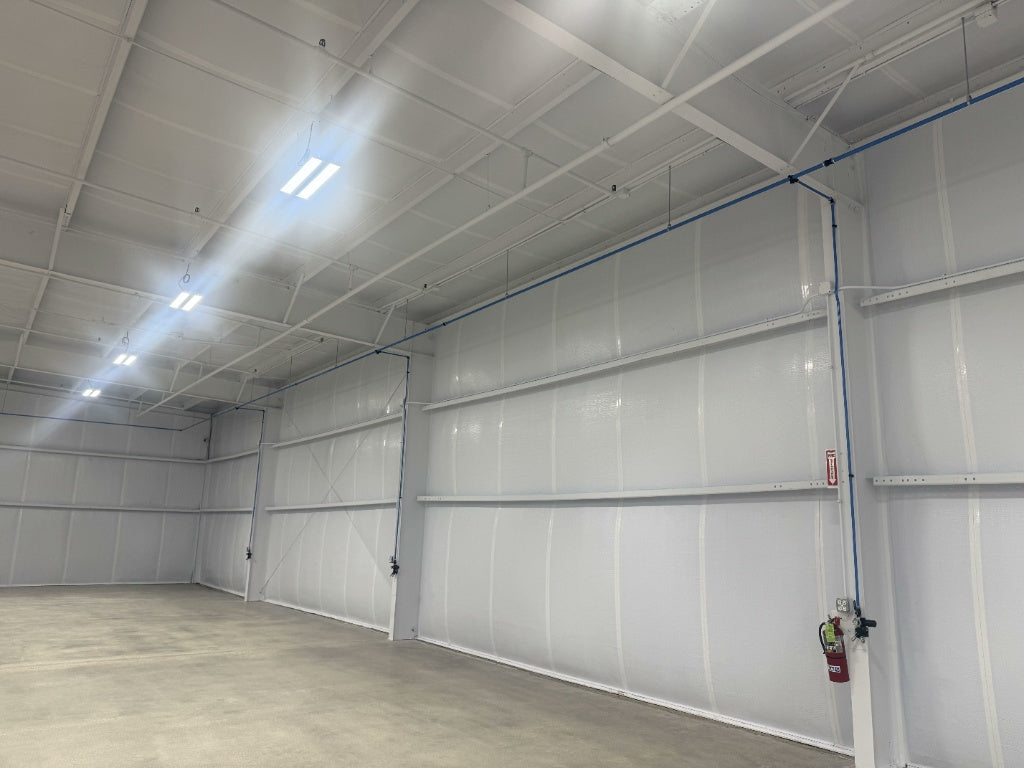
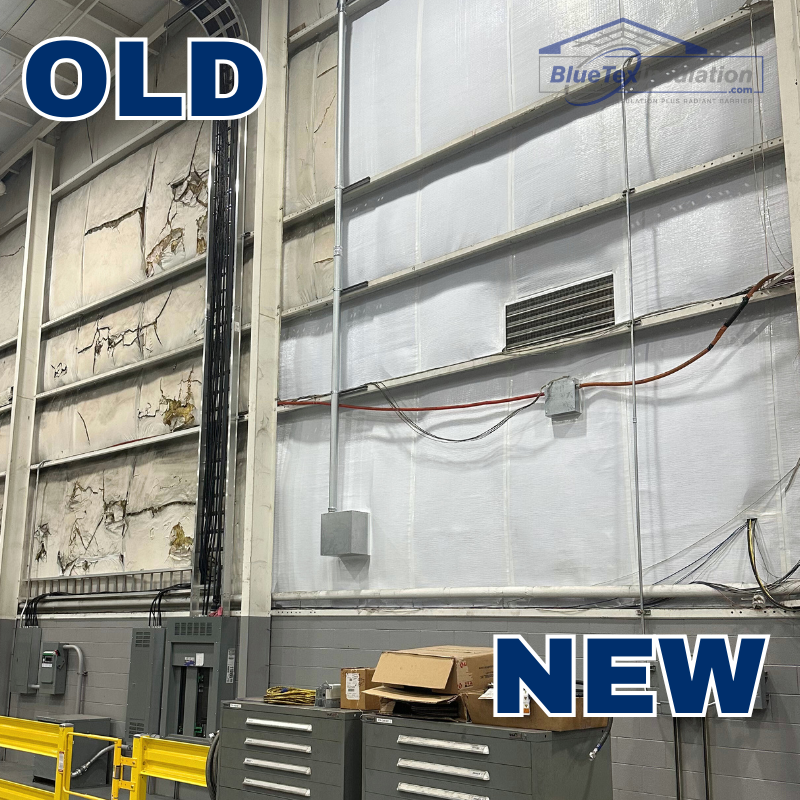
The BlueTex™ TermBar Cover & Repair System installs a new, tearproof and puncture-resistant vapor barrier directly over your existing wall insulation - no tear-out, no mess, no fumes, no contractor license required.
You leave the old insulation in place. No removal, no disposal, no mess. BlueTex™ installs directly over it and is 10 times more durable than the original builder-grade facing your building came with.
Tools Needed
Screw gun - Lift - Utility knife
Crew Speed
1,000-2,000 sq ft / day
Demo Required
None - installs over existing
BlueTex™ TermBar Cover & Repair System - Overview
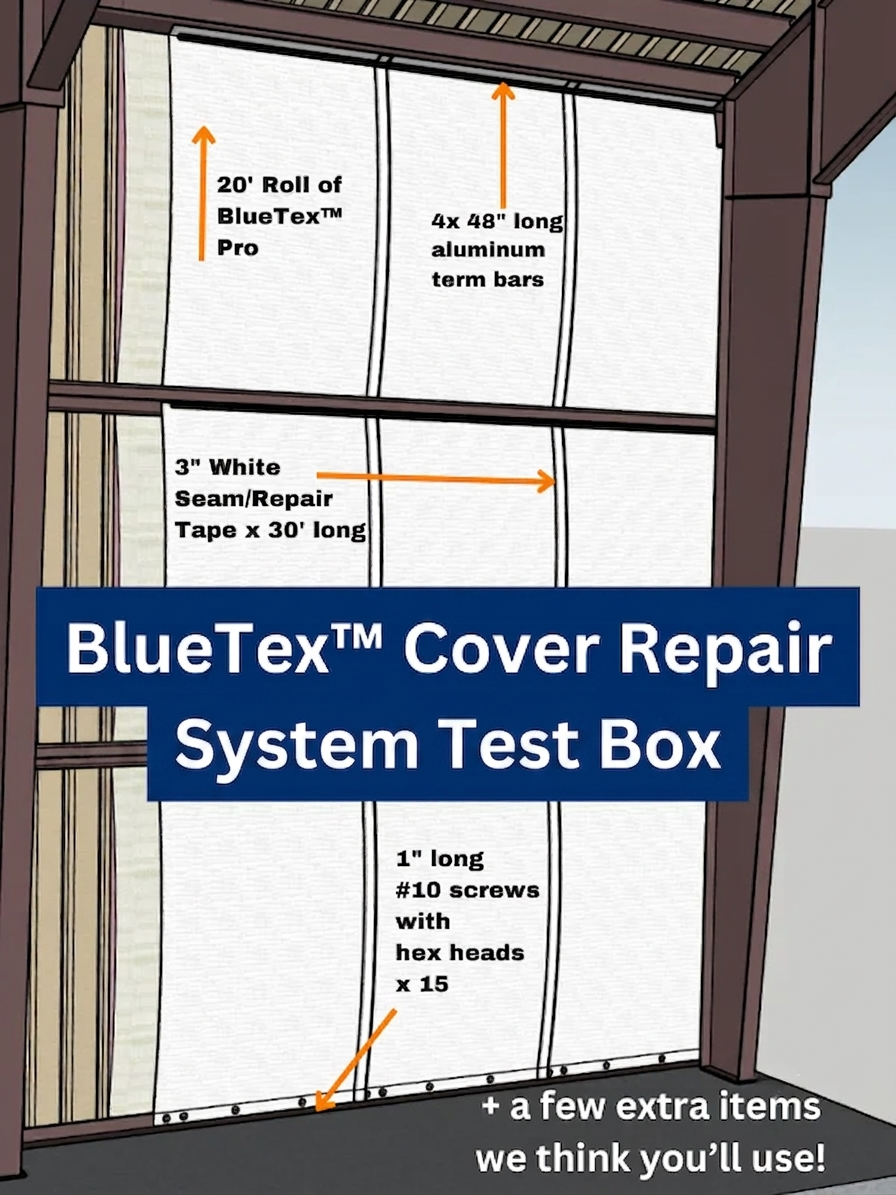
Order Your Cover/Repair Test Kit - Fully Refundable
Not sure yet? Order a Test Box first.
The Cover/Repair Test Box lets you install one wall section, show the owner or tenant the result, and confirm before committing to the full building. The cost is fully refundable as credit on any order over $500.
Contractor Install Guide Below Here
Full Installation Specifications. Step-by-step instructions for contractors, experienced DIYers, and anyone who wants the full technical detail.
Step-by-step install walkthrough - Inside Purlins Method
There are two ways to cover old wall insulation. This page covers installation inside the purlins - working between the horizontal wall supports from inside the building. The over-purlin (or girts) method guide is here.
Installing BlueTex™ inside the wall purlins
Supplies Needed
BlueTex™ Pro 2mm 50" wide insulation - plan to yield about 650 sq ft of coverage from every 700 sq ft roll
BlueTex™ 48" wide aluminum TermBars (screws included) - or 1" x 2" wood strips as an alternative
How the Inside-Purlin Method Works
- You will use multiple vertical pieces of BlueTex™ to fit inside the purlins.
- Most buildings have Z-purlins (or Z-bars) where the front flange points up and the back flange points down.
- The install system uses the tops/bottoms of the purlin supports to secure the BlueTex™ insulation close against the existing old metal building insulation.
- BlueTex™ will hang down like a curtain during installation, so you can attach it to the top and bottom of the purlins
- Each 700 sq ft roll yields about 650 sq ft of actual coverage - the difference accounts for the 2" overlap on each panel and the 2-3" tabs used to fasten into the purlins top and bottom.
- You can install Up/Down in a single column OR move left/right to complete a full horizontal cavity before moving to the next row. Direction has no impact on performance.
Start at the Bottom Section - First Purlin to the Ground
- Start by measuring the height from the floor to your first wall purlin.
- Cut a piece of BlueTex™ off your roll to the height measured, plus an extra 6".
- Hold your BlueTex™ up to the column edge and the bottom flange of the purlin. Have your helper press the aluminum TermBar against the BlueTex™, leaving a tab protruding above the TermBar of about 2".
- Secure the BlueTex™ to the purlin by screwing the TermBar into the metal purlin, leaving a 2" overlap of the BlueTex™ uncovered.
- Your BlueTex™ piece will hang down like a curtain - pull it down toward the ground and prepare to secure it tightly at the bottom.

Secure the Bottom Near the Floor
There are a couple of ways to secure your BlueTex™ at the floor. Choose the option that works best for your building.
Option 1 - Push BlueTex™ onto existing screws through the floor L-bracket
- If you have screws coming through the L-brackets, use insulation washers and push directly onto the existing screws.
- A 1/2" deep socket works great - use a hammer to tap on, or a hammer drill in hammer-only mode.


Option 2 - Screw BlueTex™ into metal panel rib cavities
- Use 3/4" self-drilling screws with insulation washers to secure the BlueTex™ to the bottom L-bracket.
- Screws can only go where the ribs are in your panel - do not put screws between ribs or you will penetrate the exterior metal.
- Rib spacing is typically 9-12" on center and is very consistent. Measure the center-to-center distance on the outside of the building before drilling.
- Cut into the old insulation to find a rib, or probe through with a screwdriver. Mark the L-bracket for screw placement before fastening.
Option 3 - Use TermBar on concrete
- Cut off any existing screws poking through at the bottom of the wall so the surface is flush.
- Bring the TermBar all the way down to the concrete and treat the concrete like the top of a purlin - the BlueTex™ gets sandwiched between the TermBar and the concrete, exactly like it does between the TermBar and the metal purlin above.
- Fasten with concrete screws (Tapcon or equivalent) - a 3/16" masonry bit in a hammer drill makes quick work of pre-drilling.
- A Ramset (.22 caliber powder-actuated nail gun) is a faster alternative when you have a lot of linear footage to cover.
- Use 3 fasteners per 48" TermBar, evenly spaced - same pattern as a standard purlin install.
- Seal the bottom edge with 3" white vapor barrier seam tape, tucked between the TermBar and the BlueTex™ with a putty knife.

Repeat for Every Row Above
Repeat the process from Steps 1 and 2 for each wall section between purlins.
Always start at the top of each cavity so the BlueTex™ hangs down like a curtain.
Overlap the next piece of BlueTex™ by 2" onto the piece below. This gives the seam tape a solid surface to bond to and seals out any air path to the cold metal. Sandwich the overlap against the bottom flange of the upper purlin with a TermBar, then drive your 3 screws to lock it in. Butt each TermBar end-to-end against the next so they form one continuous aluminum line across the full purlin. No gaps between bars, no exposed BlueTex™ between TermBars.
Pull the BlueTex™ down and use the TermBar to sandwich it between the termbar and the purlin. Use the small lip protruding under the TermBar to keep the material tight, smooth, and flat.
Seal All Seams
- Continue across the full width of the wall until all rows are covered and secured top and bottom with TermBars or wood strips.
- Seal every vertical seam with the 3" wide white vapor barrier seam tape. Press firmly across the full length of the tape. The tape is PRESSURE Activated, so the harder you press, the better the bond. It will take a couple of months to fully chemically bond to the BlueTex™ and form a permanent seal.
- Run the tape a few inches past the top and bottom of each seam so you have extra to work with. "Tuck" those extra inches between the TermBar and the BlueTex™ using a putty knife so the seam is sealed all the way into the TermBar.
- Tape every vertical seam between rolls. If you see any spots along the outside edges of a cavity where the BlueTex™ doesn't sit tight against the purlin or where a small gap is showing, run a strip of seam tape over that gap too. The goal is zero open paths from the warm inside air to the cold metal behind the insulation.
Finishing Touches
Trimming - Not required, but you can trim excess BlueTex™ that sticks past the TermBars flush with a utility knife.
Painting - BlueTex™ accepts standard Enamel paint. You can also spray paint the TermBars, screws or wood strips white if you want them to blend in.

Frequently Asked Questions
Do I need to remove the old insulation first?
No. The system installs directly over existing insulation. The old material stays in place behind the new BlueTex™ layer. Removing it adds significant labor and cleanup with no benefit.
What is the difference between installing inside the purlins vs. over the purlins?
Inside the purlins fills each cavity with a vertical panel held by TermBars - purlins stay visible, less material, faster. Over the purlins covers them entirely with a continuous horizontal run. Both guides are on this site.
Can I use wood strips instead of aluminum TermBars?
Yes. A 1x2 or 1x3 furring strip is a functional substitute. Aluminum TermBars are preferred for their L-shape fit at the purlin corner and center screw notch, but wood works on most buildings.
How do I handle corners and door openings?
The key is to “picture frame” the BlueTex™ so it is mounted on all sides to prevent air from getting past to the cold metal. You may need to cut down some TermBars or use screws and washers (Provided with termbars) to attach to non-standard areas.
Can this be installed in an occupied building?
Yes. No fumes, no off-gassing, no hazardous materials. Can be installed in a fully occupied building at any time of year.
Can BlueTex™ be painted after installation?
Yes, with standard enamel paint. ONLY Spray method is recommended AFTER installing the BlueTex™, seam tape and TermBars.
Can I get help if I run into a problem?
Yes. Email us photos of your building and where you are in the install. We can usually respond the same day with guidance specific to your situation.